
Magento 2 stores can offer XRP as an individual coin (QR code on the order confirmation page) or on the hosted multi-coin page. XRP settles in seconds with tiny fees. PayGate.to supports native XRP on the XRP Ledger: each order gets a one-time XRP address (no tag needed by the customer), and the XRP is forwarded to your own wallet, including your destination tag if your account needs one.
Step 1: Get an XRP wallet address
You need an XRP address you control (r…), from Trust Wallet or OKX Web3 Wallet. If your account needs a tag, write it as r…?dt=TAG or use an X-address. Details: Get an XRP address with a destination tag.
Step 2: Install or update the Magento plugin
Install the module with Composer or by copying it to app/code/PayGate/CryptoPayment/, then run the bin/magento setup commands, as shown in Crypto payments on Magento (use the latest version for XRP).
Step 3: Paste your XRP wallet
Open Stores › Configuration › Sales › Payment Methods › PayGate.to Crypto Payments.
- Multicoin: paste your XRP wallet into XRP Wallet (XRP Ledger) and click Save Config.
- Individual coins: tick XRP and insert the same wallet. Customers pay the QR code on your order confirmation page.

Step 4: What your customer sees
The customer chooses XRP, gets the exact amount converted from your order total, a one-time address and a QR code.
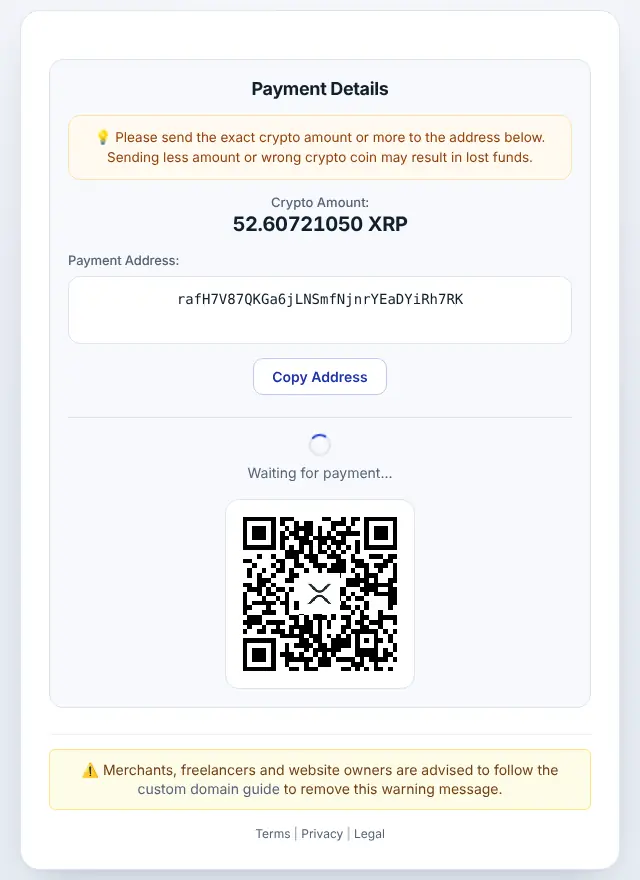
Step 5: Order completed automatically
When the payment is confirmed, the order is invoiced and moves to Processing, and the invoice email is sent. The admin order page shows the amounts received, transaction IDs and the IPN token.
XRP on Magento: good to know
- Minimum: 2 XRP at the time of writing (live minimums). A new address needs 1 XRP reserve; the first payout covers it.
- Timing: XRP Ledger payments are final in a few seconds.
- Callbacks:
address_outlists your payout asr…?dt=TAG, even if you entered an X-address. - The quoted coin amount is honoured for 3 hours.
- Underpaid orders go On Hold; the customer can send the rest to the same address and both payments are added up.
- The callback URL
/paygatecrypto/callback/indexmust be reachable: no password, IP allow-list or maintenance mode in front of it. - Order statuses: Awaiting crypto payment → Processing; On Hold if underpaid; cancelled after Cancel Unpaid Orders After (48 hours by default).
Frequently asked questions
Do customers need to enter a destination tag?
No. They pay a one-time address without a tag. Only your payout wallet may have one.
Can I paste an X-address into the field?
Yes. The plugin accepts r…, r…?dt=TAG and mainnet X-addresses.
Do I need an account or API key?
No. The plugin only needs your public wallet addresses. Neither you nor your customers register with PayGate.to.
Which other platforms support XRP?
WooCommerce · Easy Digital Downloads · WHMCS · FOSSBilling · OpenCart · PrestaShop · Paymenter. See Accept XRP payments for the overview.